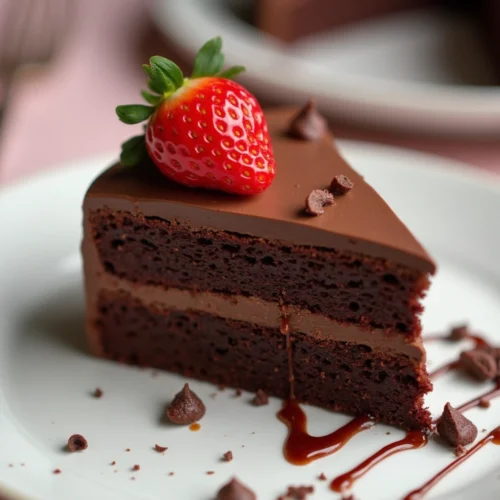
Peanut Butter Chocolate Layer Cake
- Prep Time: 30 minutes
- Cook Time: 35 minutes
- Total Time: 1 hour 5 minutes
- Yield: 1 two-layer 9-inch cake 1x
- Category: Dessert
- Cuisine: American
Description
This Peanut Butter Chocolate Layer Cake is the ultimate dessert for chocolate and peanut butter lovers! Featuring rich, moist chocolate cake layers sandwiched between creamy, luscious peanut butter frosting, this cake is finished with a silky chocolate ganache drizzle. Perfect for birthdays, celebrations, or just an indulgent treat, this cake is sure to impress!
Ingredients
For the Chocolate Cake:
- 2 cups all-purpose flour
- 2 cups granulated sugar
- 3/4 cup unsweetened cocoa powder
- 2 teaspoons baking powder
- 1 1/2 teaspoons baking soda
- 1 teaspoon salt
- 1 cup whole milk
- 1/2 cup vegetable oil
- 2 large eggs
- 2 teaspoons vanilla extract
- 1 cup boiling water
For the Peanut Butter Frosting:
- 1 cup unsalted butter, softened
- 1 1/2 cups creamy peanut butter
- 4 cups powdered sugar
- 1/3 cup heavy cream
- 1 teaspoon vanilla extract
For the Chocolate Ganache:
- 1 cup semi-sweet chocolate chips
- 1/2 cup heavy cream
Instructions
Prepare the Chocolate Cake:
- Preheat your oven to 350°F (175°C). Grease and flour two 9-inch round cake pans.
- In a large bowl, whisk together the flour, sugar, cocoa powder, baking powder, baking soda, and salt.
- Add the milk, vegetable oil, eggs, and vanilla extract. Mix until well combined.
- Slowly pour in the boiling water while mixing, until the batter is smooth. The batter will be thin, but that’s normal.
- Divide the batter evenly between the two cake pans and bake for 30-35 minutes, or until a toothpick inserted in the center comes out clean.
- Let the cakes cool in the pans for 10 minutes, then transfer to a wire rack to cool completely.
Make the Peanut Butter Frosting:
- In a large bowl, beat the softened butter and peanut butter until smooth and creamy.
- Gradually add the powdered sugar, mixing well after each addition.
- Add the heavy cream and vanilla extract, and beat until light and fluffy.
Assemble the Cake:
- Place one cake layer on a serving plate. Spread a generous amount of peanut butter frosting on top.
- Place the second cake layer on top and cover the entire cake with the remaining frosting.
Prepare the Chocolate Ganache:
Heat the heavy cream until hot (but not boiling) and pour over the chocolate chips. Let sit for 1-2 minutes, then stir until smooth.
Drizzle the ganache over the cake, letting it drip down the sides.
Let the ganache set before slicing and serving. Enjoy!
Notes
- For an extra crunch, add chopped peanuts between the layers or on top of the cake.
- If you prefer a sweeter frosting, add more powdered sugar to taste.
- Store leftovers in an airtight container at room temperature for up to 2 days or refrigerate for up to 5 days.
Nutrition
- Serving Size: 1 slice
- Calories: 520
- Fat: 30g
- Carbohydrates: 60g
- Protein: 8g
A peanut butter chocolate layer cake is the perfect dessert for anyone who loves the rich, fudgy taste of chocolate paired with the creamy, nutty goodness of peanut butter. This indulgent cake features moist chocolate layers, smooth peanut butter frosting, and a luscious chocolate ganache topping. Whether for a birthday, celebration, or just a weekend treat, this cake is guaranteed to impress.
In this guide, we’ll cover everything from the best ingredients and step-by-step recipe to expert tips, variations, and frequently asked questions.
Ingredients Needed for the Best Peanut Butter Chocolate Layer Cake
To create a rich, moist, and flavorful peanut butter chocolate layer cake, you need the right combination of ingredients. This section will break down everything you need for the chocolate cake base, peanut butter frosting, and chocolate ganache topping to ensure the perfect balance of flavors and textures.
Essential Ingredients for the Chocolate Cake Base
A moist, tender chocolate cake is the foundation of this dessert. Here’s what you’ll need:
| Ingredient | Purpose in the Cake |
|---|---|
| All-purpose flour (2 ½ cups) | Provides structure and stability. Cake flour can be used for a softer texture. |
| Unsweetened cocoa powder (¾ cup) | Gives the cake a deep, rich chocolate flavor. Dutch-processed cocoa works best. |
| Baking soda & baking powder (1 teaspoon each) | Helps the cake rise and stay fluffy. |
| Salt (½ teaspoon) | Balances the sweetness and enhances the chocolate flavor. |
| Granulated sugar (2 cups) | Sweetens the cake while helping it stay moist. |
| Eggs (3 large) | Adds structure and makes the cake tender. |
| Vegetable oil (½ cup) | Keeps the cake moist. Can substitute with melted butter for a richer taste. |
| Buttermilk (1 cup) | Adds moisture and a slight tangy flavor, making the cake softer. |
| Hot coffee or hot water (1 cup) | Enhances the chocolate flavor and creates a smoother batter. |
| Vanilla extract (2 teaspoons) | Brings out the flavors of both chocolate and peanut butter. |
Pro Tip: Adding hot coffee instead of water deepens the chocolate flavor, but it won’t make your cake taste like coffee!
Choosing the Right Peanut Butter for Frosting
Peanut butter is the star of the frosting, so picking the right type makes all the difference.
✔ Best Choice: Creamy, processed peanut butter (like Jif or Skippy) – provides a smooth, stable texture.
✔ Avoid: Natural peanut butter – tends to separate and can make the frosting too oily or grainy.
Pro Tip: If you prefer a slightly chunky frosting, you can use chunky peanut butter or mix in finely chopped roasted peanuts.
Best Chocolate for a Rich Flavor
Using high-quality chocolate will take your cake to the next level.
| Type of Chocolate | Best Use | Why It Works |
|---|---|---|
| Dutch-processed cocoa powder | Cake batter | Adds an intense, smooth chocolate flavor. |
| Semi-sweet or dark chocolate (60-70% cocoa) | Chocolate ganache | Balances sweetness and richness. |
| Milk chocolate | Decoration | Adds a sweet contrast to the deep chocolate cake. |
Pro Tip: Using a mix of cocoa powder in the batter and melted chocolate in the ganache creates a well-balanced chocolate flavor.
Step-by-Step Instructions for Baking the Cake
A perfectly baked Peanut Butter Chocolate Layer Cake starts with precise preparation, the right baking techniques, and attention to detail. In this section, we’ll cover everything from mixing the batter to ensuring your cake layers are baked to perfection.
Preparing the Cake Batter
Creating a moist and rich chocolate cake requires using high-quality ingredients and following a few essential steps:
1. Gather Your Ingredients
Before you start mixing, make sure you have the following:
- Dry ingredients: All-purpose flour, unsweetened cocoa powder, baking powder, baking soda, and salt.
- Wet ingredients: Eggs, buttermilk, vegetable oil, and vanilla extract.
- Sweeteners: Granulated sugar and brown sugar for extra moisture.
- Liquid for moisture: Hot coffee or boiling water (enhances the chocolate flavor).
2. Sift the Dry Ingredients
Sifting helps aerate the flour and cocoa powder, making the batter lighter and preventing lumps. In a large bowl, whisk together:
- 2 ½ cups all-purpose flour
- 1 cup unsweetened cocoa powder
- 2 teaspoons baking powder
- 1 teaspoon baking soda
- ½ teaspoon salt
3. Beat the Wet Ingredients
In a separate bowl, whisk together:
- 3 large eggs
- 1 ½ cups granulated sugar
- ½ cup brown sugar
- 1 cup vegetable oil
- 1 tablespoon vanilla extract
- 1 cup buttermilk
Using an electric mixer, beat until well combined.
4. Combine Wet and Dry Ingredients
Gradually add the dry ingredients into the wet mixture, stirring gently. To enhance the cake’s moisture, slowly mix in 1 cup of hot coffee or boiling water. The batter will be slightly thin, which is normal.
Baking the Cake Layers Perfectly
Now that your batter is ready, it’s time to bake!
1. Prepare the Cake Pans
- Grease and flour three 8-inch round cake pans or line them with parchment paper.
- Preheat the oven to 350°F (175°C).
2. Divide and Bake the Batter
- Evenly pour the batter into the three prepared pans.
- Gently tap the pans on the counter to remove air bubbles.
- Bake for 30-35 minutes or until a toothpick inserted in the center comes out clean.
3. Cool the Cake Layers
- Let the cakes cool in the pans for 10 minutes.
- Transfer them to a wire rack to cool completely before frosting.
Tips for Moist and Fluffy Cake
- Use Room Temperature Ingredients – This helps everything mix smoothly.
- Don’t Overmix – Overmixing can make the cake dense and tough.
- Measure Ingredients Correctly – Use a kitchen scale for accuracy.
- Check for Doneness Early – Ovens vary, so start checking at the 28-minute mark.
- Wrap in Plastic After Cooling – This locks in moisture if storing overnight.
Making the Peanut Butter Frosting & Filling
A rich and creamy peanut butter frosting is what makes this Peanut Butter Chocolate Layer Cake truly irresistible. It should be smooth, fluffy, and have the perfect balance of sweetness and peanut butter flavor. In this section, we’ll go over how to make the best peanut butter frosting and filling, along with expert tips for a flawless texture.
How to Achieve the Perfect Peanut Butter Creaminess
The key to a perfect peanut butter frosting is using the right type of peanut butter and achieving the ideal consistency. Here’s what you need to know:
Choosing the Best Peanut Butter
- Use creamy peanut butter (like Jif or Skippy) for a smooth consistency.
- Avoid natural peanut butter—it separates easily and can make the frosting grainy.
Ingredients for Peanut Butter Frosting
To make a rich and fluffy peanut butter frosting, gather the following:
| Ingredient | Amount |
|---|---|
| Unsalted butter (softened) | 1 cup (2 sticks) |
| Creamy peanut butter | 1 ½ cups |
| Powdered sugar | 3 cups |
| Heavy cream | ⅓ cup (adjust as needed) |
| Vanilla extract | 1 teaspoon |
| Salt | ¼ teaspoon |
Step-by-Step Instructions
Beat the Butter & Peanut Butter
- In a large bowl, use an electric mixer to beat 1 cup of softened butter and 1 ½ cups of peanut butter until smooth (about 2 minutes).
Add Powdered Sugar Gradually
- Slowly add 3 cups of powdered sugar, one cup at a time, beating on low speed to prevent mess.
Incorporate Heavy Cream & Vanilla
- Add ⅓ cup heavy cream and 1 teaspoon vanilla extract while mixing on medium speed.
- If the frosting is too thick, add a tablespoon of heavy cream at a time until you reach the desired consistency.
Final Whip for Fluffiness
- Beat on high speed for 2-3 minutes until the frosting becomes light and fluffy.

Balancing Sweetness & Texture
The perfect peanut butter frosting should be sweet but not overpowering. Here’s how to adjust it:
- Too Sweet? Add a pinch of salt to balance the flavors.
- Too Thick? Mix in 1-2 tablespoons of additional heavy cream.
- Too Runny? Add more powdered sugar (1/4 cup at a time) and mix until thickened.
Best Tools for Frosting Application
To make frosting the cake easier, use these tools:
| Tool | Purpose |
|---|---|
| Offset spatula | Smooths frosting evenly |
| Piping bag with a large tip | Creates decorative swirls |
| Bench scraper | Gives sharp, clean edges |
| Turntable | Helps with even frosting application |
Assembling the Cake Layers
Now that your Peanut Butter Chocolate Layer Cake is baked and your peanut butter frosting is ready, it’s time for the most exciting part—assembling the cake! Proper layering and filling ensure a beautiful presentation and a stable, well-balanced cake.
Leveling & Stacking the Cake Evenly
A well-assembled cake starts with even layers. Here’s how to achieve a professional look:
1. Level the Cake Layers
- Use a cake leveler or a serrated knife to trim the domed tops off each cake layer.
- This step ensures the cake layers stack evenly and don’t lean.
2. Place the First Cake Layer on a Cake Board
- Position one cake layer on a cake stand or turntable for easy decorating.
- Secure it with a small dollop of frosting underneath to keep it from sliding.
3. Apply the Peanut Butter Filling
- Use an offset spatula to spread a generous layer of peanut butter frosting evenly across the first cake layer.
- For a professional look, pipe a frosting border around the edge before spreading the filling—this keeps it from spilling over.
4. Repeat the Process
- Place the second cake layer on top and repeat the frosting process.
- Finally, add the third layer and press gently to ensure stability.
Applying the Peanut Butter Filling
To get an even, creamy filling between layers:
- Use about ¾ cup of frosting per layer to ensure a balanced cake-to-frosting ratio.
- Spread it evenly using smooth, sweeping motions to prevent air pockets.
- Chill the cake for 10-15 minutes between stacking layers to help set the filling and avoid sliding.

Ensuring Structural Stability
A tall layer cake can be tricky to keep stable. Here’s how to prevent it from tilting or collapsing:
- Chill Before Final Frosting: Refrigerate the stacked cake for at least 30 minutes to firm up the filling.
- Use Cake Dowels (Optional): If making a tall cake, insert 2-3 small dowels (or straws) for extra support.
- Check for Even Layers: Step back and look at your cake from different angles to ensure it’s level before frosting the outside.
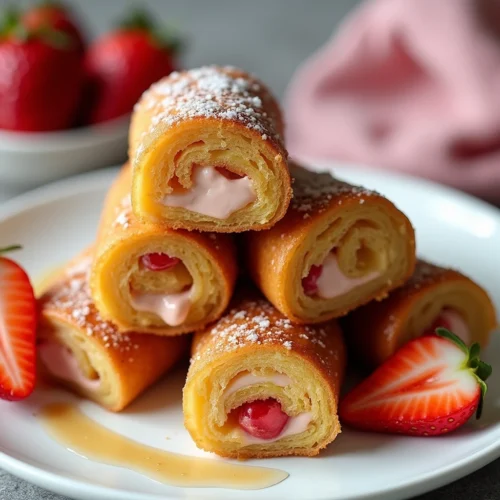
Now that your batter is ready, it’s time to bake! If you’re a fan of fruit and chocolate combinations, you’ll love this Strawberry Chocolate Cake – The Best Recipe for a Decadent Dessert. It features a delicious blend of rich chocolate and fresh strawberries, perfect for special occasions!
FAQs – Peanut Butter Chocolate Layer Cake
Before we wrap up, here are some common questions about making this Peanut Butter Chocolate Layer Cake, along with expert answers to help you achieve the best results.
1. How do I keep my chocolate cake moist?
To ensure a moist cake:
- Use buttermilk or sour cream for extra tenderness.
- Don’t overbake—check for doneness with a toothpick at 28-30 minutes.
- Wrap cake layers in plastic wrap if making ahead to retain moisture.
2. Can I make this cake ahead of time?
Yes! You can bake the cake layers up to 2 days in advance. Store them wrapped at room temperature or refrigerate for longer storage. The assembled cake can also be stored in the fridge for up to 3 days before serving.
3. What’s the best peanut butter for frosting?
Use creamy peanut butter like Jif or Skippy for the smoothest texture. Avoid natural peanut butter, as the oil separation can make the frosting grainy.
4. Can I make this cake gluten-free?
Yes! Substitute all-purpose flour with a gluten-free 1:1 baking blend. Make sure all other ingredients, like baking powder and cocoa powder, are certified gluten-free.
5. How do I store leftover cake for freshness?
- Room temperature: Store in an airtight container for 1-2 days.
- Refrigerator: Keep covered for up to 5 days.
- Freezer: Wrap individual slices and freeze for up to 3 months.
6. What’s the best way to cut clean cake slices?
Use a warm, sharp knife (run under hot water and wipe dry before slicing). Clean the knife between cuts for sharp, even slices.

Conclusion
A Peanut Butter Chocolate Layer Cake is the ultimate dessert for chocolate and peanut butter lovers. With its moist chocolate layers, creamy peanut butter frosting, and rich chocolate ganache, this cake is perfect for birthdays, celebrations, or simply indulging your sweet tooth.
By following these step-by-step instructions, baking tips, and expert advice, you can create a bakery-quality cake right at home. Whether you enjoy it with a glass of milk or a cup of coffee, this cake is guaranteed to impress!
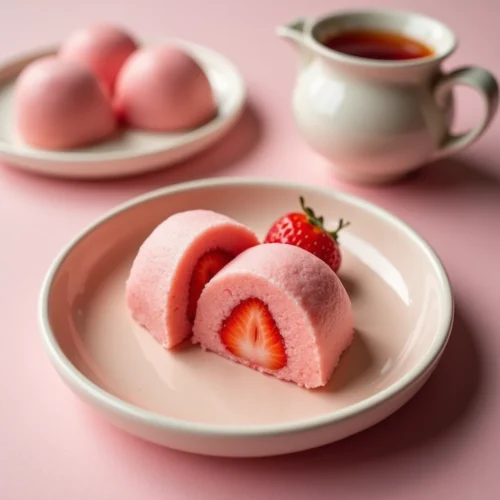
If you enjoy unique and chewy desserts, why not try something different after indulging in this cake? Check out this Strawberry Mochi Recipe for a fun and fruity Japanese treat. It’s a great way to explore new flavors while satisfying your sweet tooth!
Connect with us
Stay connected with us and discover delicious recipes by following Benny’s Recipes on social media! Join us on Instagram for mouthwatering food inspiration, like us on Facebook for the latest updates, explore our collections on Pinterest, and follow us on X for exciting tips and culinary ideas. Let’s make every meal unforgettable together!